The latest crime data highlights the most stolen car makes and models in Melbourne and Victoria, and where thefts are occurring.
Car Maintenance


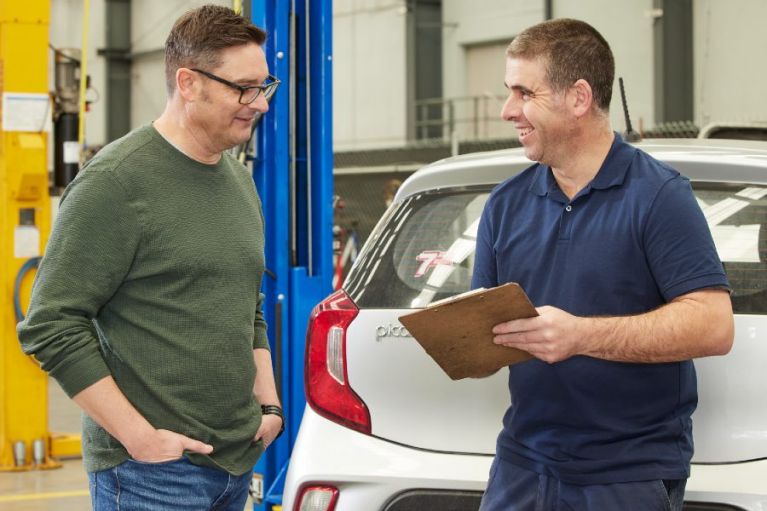
What you should leave to a qualified professional
Easy DIY car maintenance tips and safety checks
From tyre pressure to fluid levels, learn the simple, step‑by‑step car maintenance checks that all Australian drivers should know.
Regularly checking your car will give you a good understanding of its general condition and increase your awareness of warning signs or changes that indicate problems. Catching an issue early may prevent serious damage and save you money on expensive repairs.
The basic maintenance tips and safety checks in this guide complement regular servicing based on your vehicle’s logbook, and are not a substitute for getting a qualified professional to diagnose and repair car problems. Most checks here apply to petrol and diesel cars, as well as electric vehicles, which may not need as much conventional servicing, but should still be maintained with regular inspections.
Carry out these general routine checks between scheduled services to help keep your car in optimum condition and run as economically as possible.
It’s also important to ensure your car is well prepared and safe for the road, so pack an emergency car safety kit, and update your emergency roadside assistance plan.
DIY car maintenance and safety checklist
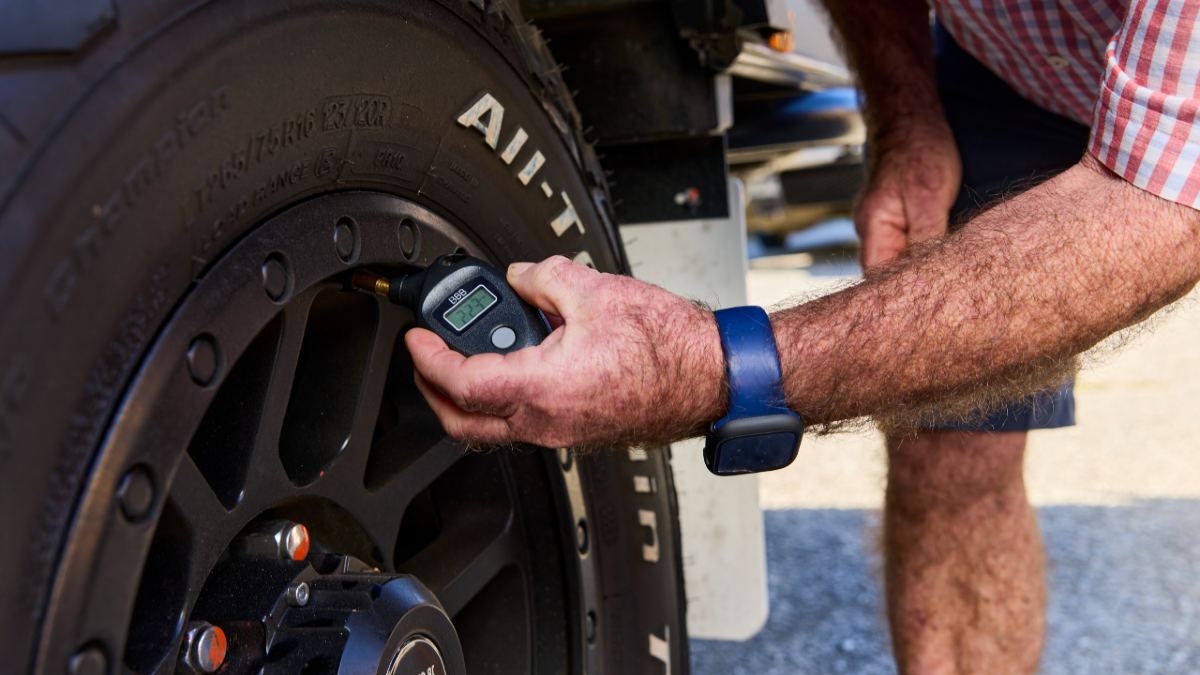
Keeping your tyres at the recommended air pressure is an easy way to prolong the life of the tyre and enhance safety. Image: Matt Harvey.
DIY car tyre maintenance
How to check your car’s tyre pressures
Keeping your car's tyres at the correct pressure doesn't just extend their life and increase your safety - it's also one of the easiest ways to improve your fuel efficiency and maximise your EV driving range.
Read more: How to reduce fuel costs and improve your car's efficiency.
All car manufacturers provide recommended tyre pressures for each model. These should be listed on a placard that’s usually located on the door jamb inside the driver’s door. Some cars also have the placard in other locations, such as the glove box or fuel filler lid.
Always check tyre pressures when they are cool. Tyres warm up after a few kilometres on the road and that can give misleading pressure readings.
You can check your tyre pressure at home if you have a portable air compressor. Otherwise, tyre pressure hoses with a gauge attached are provided at most service stations for free use. Some service stations also have automatic systems that fill to the pressure you enter. These are great but be aware they are sometimes not well maintained.
Step-by-step guide to checking your car's tyre pressure
- Remove the tyre valve’s screw-on dust cap, located on the outer rim of the wheel.
- Place the tyre gauge securely on the valve and check the pressure.
- Inflate the tyre to the recommended level and check again.
- Refit the dust cap, making sure no dirt gets in, as this can cause leaks.
- Always check the spare tyre, too, if the car is designed to carry a fifth wheel.
- Remember to reset your vehicle computer if your car has a tyre pressure monitoring system.
More: How to check your tyre pressure and recommended inflation
How to check for car tyre wear and safety
Check the condition of your tyres at the same time that you're checking your tyre pressures.
All tyres have inbuilt indicators that show the tyre tread depth. These are little rubber blocks that protrude from the low point in the tyre channels. If the tread gets close to the wear indicators, it’s time to change that tyre. Some tyre companies recommend replacing tyres once the depth reaches 3mm. The minimum legal limit is 1.6mm, but it’s recommended you replace tyres prior to that point.
Check for signs of uneven wear on your tyres, which could point to issues with wheel alignment, the car’s suspension or tyre inflation. It might also point to stresses placed on the tyres under certain driving situations, such as towing.
Check the entire contact surface of the tyre, including the centre and the inner and outer edges. You can view the inner surface by putting your steering wheel on full lock to expose the inside edge. If the tyre is heavily worn or below the tread depth limit, it needs to be replaced.
RACV Accredited Auto Care Centres also recommend getting your wheels aligned whenever uneven wear is detected. Misaligned wheels not only cause tyres to wear out faster, but increase the risk of vibration and skidding.
All tyres degrade over time, even if you don’t travel many kilometres each year. Look out for cracking, bulges, cuts or damage to the sidewall, and seek professional advice if you notice any of these signs or if the tyres are more than five or six years old, even if they look fine.
How often should I check my tyres if driving in Melbourne or Victoria?
Check your tyres every week or fortnight if possible, and at least once a month. Always check them before a long car journey. This includes checking their pressures and overall wear and condition.
Setting a reminder on your phone can help remind you to check your tyres.
Keeping an eye out for warning signs with your car and seeking professional help early can reduce costs in the long run.
How to check headlights, tail lights, brake lights and indicators
It’s important to ensure that all exterior lights on your car – and caravan or trailer, if you have them – are working properly, including the headlights, tail lights, brake lights and indicators. Driving with lights that are not working is contra to road rules and could leave you open to a fine or demerit points.
The easiest way to check is to have a friend or household member walk around the vehicle (and trailer) and check the light functions are working properly as you turn them on and operate them. If you don’t have another person to help, you could position the car in a safe place away from other vehicles where you can see the reflection of the lights, such as on a wall or garage door.
Modern cars increasingly have complex lighting systems, often including LEDs, and even computer modules which control their operation, so their replacement should always be left to a qualified professional. If you have an older car, refer to the owner’s manual for details on the type of globe used and the correct procedure for replacing them. But, again, it’s recommended that a qualified mechanic handles the job.
Sometimes if a light fails, in can be part of a sealed unit, in which case the whole unit (rather than just a globe) may need to be replaced.
More: The rules for using your headlights, fog lights and driving lights in Victoria.
Windscreen wiper maintenance
How to replace windscreen wipers
The rubber in your car’s windscreen wiper blades can deteriorate through use and exposure to sunlight. Check them frequently for signs of cracking or splitting, replacing if there is any indication they’re not operating properly, such as shuddering, squeaking or leaving a smear mark across the windscreen.
Scratches on the glass are also a sure sign that the wiper blades need immediate replacement, but if you’ve reached this point you should also consult a qualified professional on whether the windscreen is still in a safe condition.
There are two types of windscreen wipers - one features a blade insert which can be replaced, the other is commonly known as a Euro-style blade, which comprises the rubber and the wiper blade itself, sometimes with a choice of connectors. The correct parts for your make and model of car should be available at your local dealer or auto store. Instructions on their replacement should be in the owner’s manual, but the following can be used as a general guide.
Step-by-step windscreen wiper blade replacement
- Lift the wiper blade clear of the windscreen.
- Push the end of the rubber insert backwards along the blade until it can be lifted free, then remove it.
- Use the old insert as a template to cut the new rubber to length.
- Slide the new insert into the metal backing strip, then refit it under the retaining clip.
- Lower the blade onto the windscreen and repeat for the other side. Replace wiper rubbers in pairs for best performance.
Step-by-step Euro-style blade replacement
- Set the wipers to service position (if required for your vehicle).
- Lift the wiper arm away from the windscreen until it locks upright.
- Locate the release tab or button on the blade connector.
- Remove the old blade by pressing the tab and sliding or pulling the blade free.
- Slide the new blade into the connector until it clicks into place, then gently tug to ensure it’s secure.
- Carefully lower the wiper arm back onto the windscreen.
More complex work such as replacing the wiper arm itself should be left to a qualified professional.
How to check and refill windscreen wiper washer fluid
Routine car maintenance also involves checking your windscreen washer fluid and topping up the reservoir as required.
This should be done throughout the year as a windscreen that can’t be quickly cleared of light debris (such as leaves) and road grime, dirt, mud, etc could impact driver visibility and operation of the forward-facing safety camera system (if fitted). Operating wipers without fluid and on a dirty windscreen can also cause them to wear more quickly.
Many modern cars also use this fluid for other automatic washers across the car, such as for headlights and safety cameras and sensors.
Guide to refilling your windscreen wiper fluid
- Refer to your owner’s manual to locate the washer fluid reservoir, usually under the bonnet with a brightly coloured cap (often yellow or blue).
- Check the fluid level. Some vehicles require removing the cap and using a dipstick‑style indicator.
- Top up with clean water and approved windscreen cleaning fluid, following dilution instructions if required.
- Do not use household detergents, as these can damage wiper blades and cause streaking or corrosion.
- On many cars, the water jet on a windscreen should hit the centre of each wiper’s sweep. If washer jets are blocked, they may be gently cleared with a fine needle, unless your vehicle uses integrated jet systems, which should be adjusted by a professional.
- Oil from exhaust fumes and road grime tends to build up on a car’s windscreen. A regular wipe with a high-quality automotive glass cleaner may also help improve visibility and extend the life of the wiper rubber.
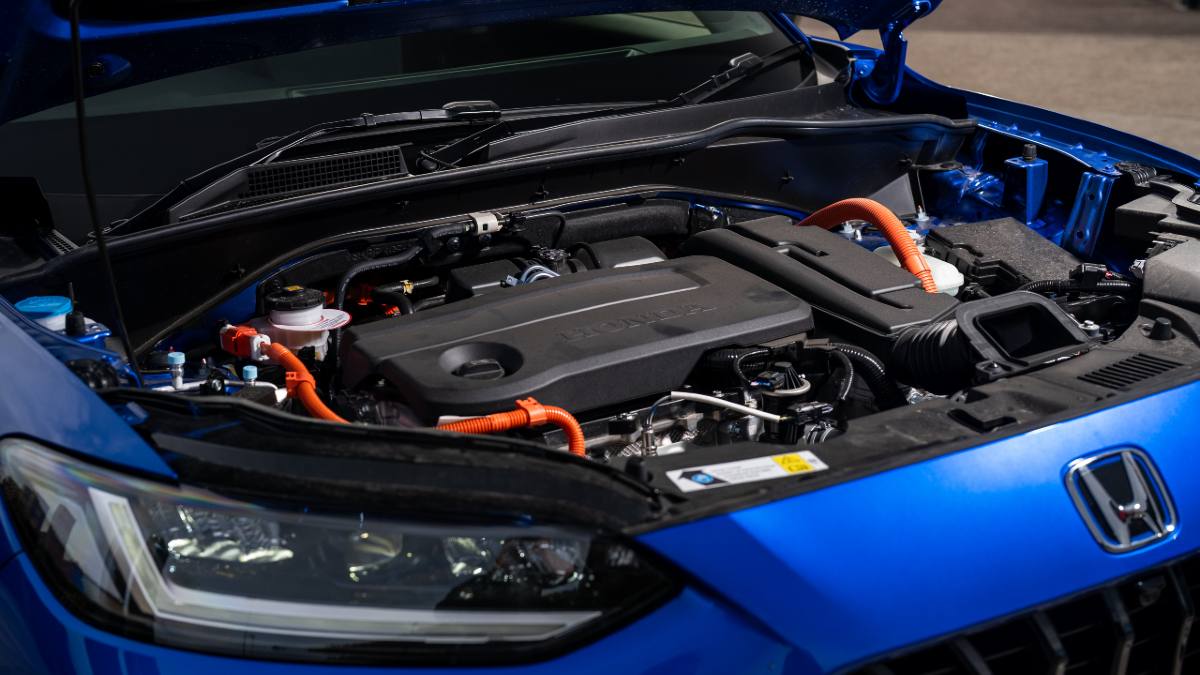
Checking the engine oil takes some care and attention, so always follow the correct procedure in your owner's manual.
How to check the engine oil level
Always consult the owner’s manual for the correct way to check your car’s engine oil level. It’s usually best done after the engine has been running for a few minutes, to get an accurate reading.
On many modern cars, there’s no need to lift the bonnet to check the oil. Instead, they will display all the relevant information (sometimes referred to as a ‘digital dipstick’) via the infotainment system in the cabin. In these cases, sensors constantly measure the oil level and should provide warnings if the car needs attention, prompting the owner to visit their nearest workshop.
Doing it the traditional way takes some care and attention, so follow the correct procedure in the owner’s manual. Some important considerations include:
- Park the car safely on a flat surface and apply the park brake.
- Never check the oil level while the engine is still running – it’s not safe and won’t provide an accurate reading.
- Turn off the engine and wait at least 10 minutes for it to cool down before checking.
- Check the owner’s handbook for the location of the dipstick.
- Remove the dipstick and use a clean rag to wipe off the oil.
- Take a look at the end and find the marks indicating the lowest and highest recommended levels.
- Put the dipstick back in, then draw it out again. Look to see where the oil level comes to; it should be around the full mark. It’s a good idea to repeat the process to be sure about the level.
- If the level is low, you need to top-up your engine oil.
- Consult your owner’s manual for the correct grade of oil, as specified by the car manufacturer.
- Also use the manual to locate the oil filler cap. Ideally, place a rag around the filler neck (to catch any spills). It’s also a good idea to use a clean plastic funnel.
- Remove the cap and carefully add some oil. As a rule of thumb, if the oil is down to the low mark it will require about half a litre.
- Give the oil time to drain into the sump and check the dipstick level after each addition. Do not overfill. Too much oil can cause as much damage as too little oil.
- Return the dipstick to its holder.
If an oil warning light remains on in your car, or any other warning lights are displayed, seek help from your dealer or qualified mechanic. The same applies if you notice an oil leak under the car, so make regular checks underneath, preferably after it’s been sitting in the same spot overnight.
How to check other fluid levels (coolant, transmission, brake, clutch, power steering)
If your car is regularly serviced according to the manufacturer’s recommended maintenance schedule, there should be little or no need to check other fluid levels such as for the automatic transmission, brakes and power steering.
As with engine oil, fluid levels for major components of a car that are down excessively or require frequent topping up is a sure sign the vehicle should be taken to a qualified mechanic or other automotive specialist immediately.
Low coolant levels can be a sign of a leak or issue internal to the engine and while coolant can be topped up, it is recommended that low coolant issues should be diagnosed by a professional mechanic.
If you must check fluid levels such as these, always consult the owner’s handbook first and carefully follow the instructions provided. Not all manufacturers will include this information, which is another indication you should take the car to a qualified mechanic or accredited service centre.
Where details are provided, the owner’s manual will be an important reference for locating the relevant reservoir and/or dipstick and for the correct process on how to safely check the fluid level.
Some important considerations:
- Always park the car safely on a flat surface and ensure the park brake is on.
- Carefully follow the instructions in the vehicle owner’s manual and adhere to all safety advice and warnings.
- Don’t remove any caps unless instructed by the car manufacturer; most fluid levels should be easily read from the markings on the outside of a clear plastic reservoir.
- Many automotive fluids are hazardous and must be handled with extreme caution.
- Automotive fluids can become easily contaminated if contact is made with dirt and other materials.
- If in any doubt, take the car to a qualified automotive professional.
Any vehicle maintenance tasks you don't feel confident completing should instead be carried out by a qualified mechanic.
Checking other areas of the car
While you’re checking under the bonnet, it’s worth taking a look at the major hoses to check they’re in good shape. Make sure the engine is cold, then go over all the car’s hoses and squeeze them to check for any soft spots or signs of cracking or splitting. If in any doubt, have them replaced.
Visible coolant hoses can be checked on electric vehicles and hybrids but it is advisable that any concerns should be raised with an EV-trained professional in the first instance. EV owners should not touch any high‑voltage components marked in orange.
Watch for warning signs of starter battery failure, a common cause of breakdowns, and refer to our guide ‘What you need to know about car batteries’ for further details.
It’s also good practice to simply walk around the vehicle when it’s parked in a safe position, looking for signs of wear and tear or damage to the car’s body. This might include corrosion, flaking paint and loose or cracked trim. Consult your local mechanic if there’s anything urgent; otherwise, make a note for when the car goes in for its next service.
More: How to protect your car’s paintwork
What you should leave to a qualified professional
All motor vehicle repair services should be left to qualified and accredited professionals. Safety checks and basic maintenance routines specific to your car will be provided in the owner’s manual; if not, that’s a good indication that more complex work should be undertaken at a mechanical service and repair centre.
Do not attempt DIY maintenance on anything you’re not trained to handle. Examples include air-conditioning degassing, anything involving the fuel system, ignition system maintenance, suspension work and brake system modifications.
If in doubt, find your nearest RACV Accredited Auto Care Centre to book in your next service. As with anything, common sense and caution is the key. If you’re not sure, consult an expert.