
Choosing the right oven for your house can help reduce your energy use. Here's how to buy an energy-efficient oven in Australia for 2025.
Energy Efficiency

Coffee machine buying guide: types, costs and what to consider
From espresso to capsule, drip to stovetop, here's how to choose the best coffee machine for your home based on their strengths, features, costs and energy usage.
Australians love their coffee, with an estimated six billion cups drunk every year. Many of those cups will be enjoyed at home, where coffee lovers can tailor their brew exactly the way they want.
And it’s not just about taste. With the cost of living rising and café coffees getting pricier, making coffee at home can also be a simple budgeting move. While a machine and beans cost more upfront, the per-cup price is often much lower than buying takeaway every day – and those small savings can add up over a week, month and year.
But if you’re making coffee at home, which coffee machine is best?
There’s no one-size-fits-all answer, with the various types of coffee machines available in Australia each having their own strengths and weaknesses.
Whether you want to live out your barista dreams or get a machine that can have coffee ready for when you wake up, this article rounds up the most common coffee makers in Australia and compares them based on their benefits, features, upfront costs and typical energy usage.
Try RACV’s free electrification calculator to estimate your savings when going electric.
In this article
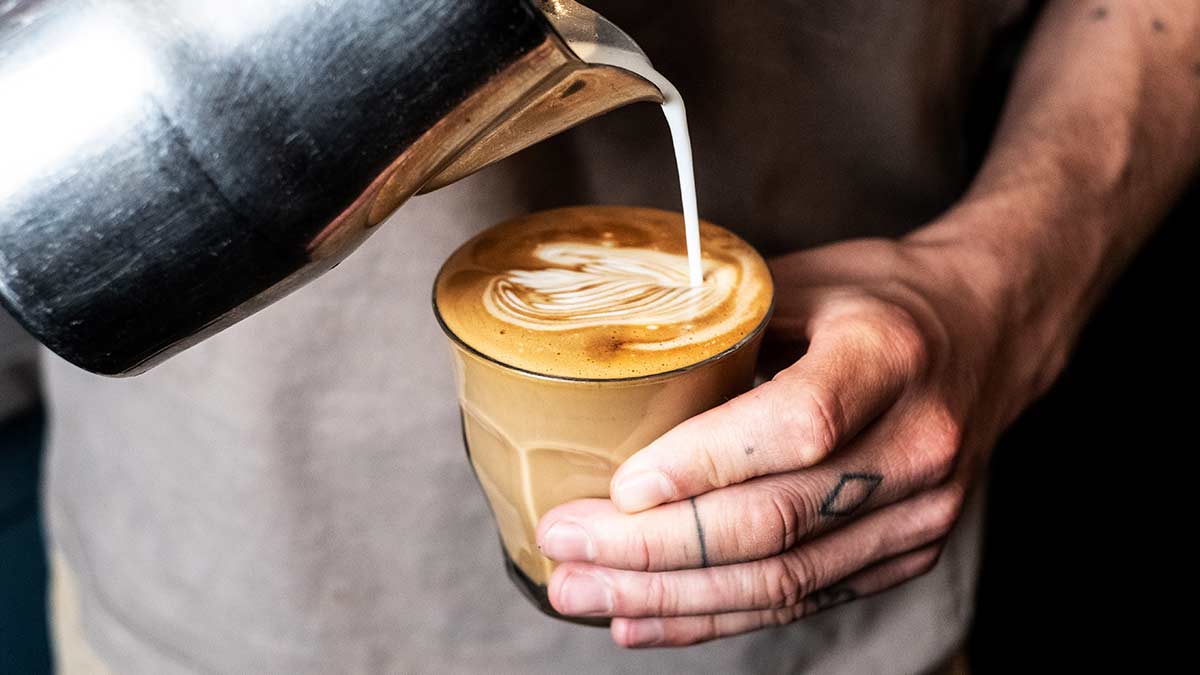
If you want a barista-quality cup of coffee at home then it's best to invest in an espresso machine - and some coffee-making skills. Image: Getty
Types of coffee machines in Australia
Espresso machines
Espresso machines are the gold-standard in at-home coffee making. They come in either manual, automatic or semi-automatic models.
Manual espresso machines
Best for: Café-style coffee just like your barista makes
A manual espresso machine is the closest you'll get to a professional brew at your favourite cafe. Espresso machines give you full control over every aspect of the coffee making process, from pulling the espresso to steaming the milk.
The major drawback of manual coffee machines is you'll need to learn how to use the machine properly to extract the best taste. If you're willing to practise, the reward is being able to customise your coffee infinitely.
Manual espresso machines tend to be more durable than automatic variants.
Cost: Basic models start at $250.
Fully automatic and semi-automatic espresso machines
Best for: Quality coffee at the touch of a button
Choose an automatic espresso machine if you still want café -passable coffee but don’t have the inclination to learn barista skills. All you have to do is add water, beans and milk and the machine can brew whatever drink you wish at the touch of a button. Fully automatic models tend to need the most professional servicing and may use more energy too (as they tend to be left turned on in standby mode when not in active use).
Read more: The hidden energy users around your home.
Semi-automatic espresso machines sit somewhere between automatic and manual models. They generally require you to grind, tamp and attach the portafilter but will take care of pulling the shot for you. Usually steaming the milk if your responsibility too.
Cost: From $250 for semi-automatic and from $500 for fully automatic models
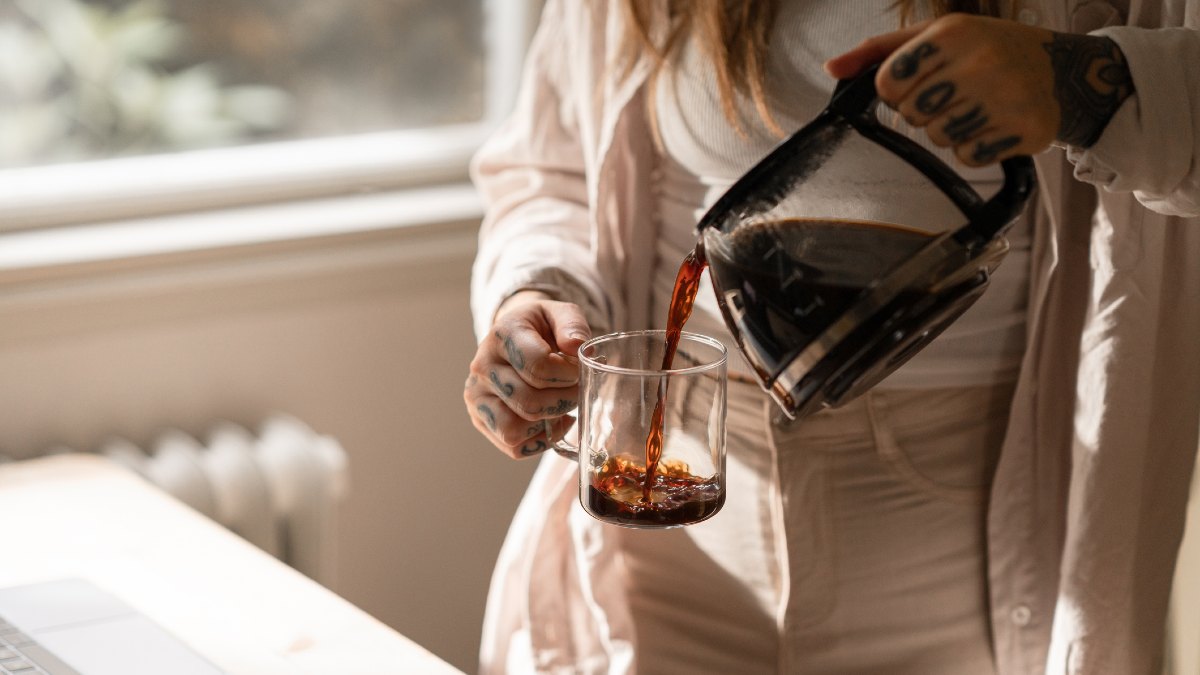
Drip filter coffee machines can be set up on a timer so that your coffee is ready as soon as your alarm goes off. Image: Getty
Capsule or pod coffee machines
Best for: Convenience and variety with a fair price point
Capsule coffee machines make a decent cup of coffee with little mess or effort. They work by using single-serve pods or capsules filled with ground coffee that are then pierced and flooded with hot water by the machine. They’re like a mini automatic espresso machine but with a lower upfront cost.
Many different varieties of pods and capsules can be purchased but be sure to get the correct brand for your machine (as they are not all interchangeable). Some capsule coffee makers also come with built-in milk steamers, though these are among the pricier models.
Cost: From $200.
Are capsule and pod coffee machines bad for the environment?
The pods and capsules used in these coffee makers are for single use only and the casings cannot be easily separated from the spent grounds. For this reason, these machines can create more waste per cup than other coffee makers (where spent coffee grounds can simply be composted).
This can be alleviated by purchasing aluminium pods, then returning the used pods to a recycling drop-off point after use. Coffee pods cannot go in your kerbside recycling bin.
Drip filter coffee machines
Best for: Cost per cup for big coffee drinkers
Drip filter coffee machines work, as the name suggests, by dripping hot water over ground coffee, through a filter, and then out into a waiting jug or glass. These coffee makers excel at making larger batches of coffee to a consistent standard and many can be programmed to begin at a pre-determined time – meaning you can set it so you wake up to the smell of freshly brewed coffee.
While old-style drip coffee machines used single-use paper filters, many modern coffee makers come with a reusable metal mesh filter. They're best for those who prefer black, not milky, coffees.
Cost: From $100.
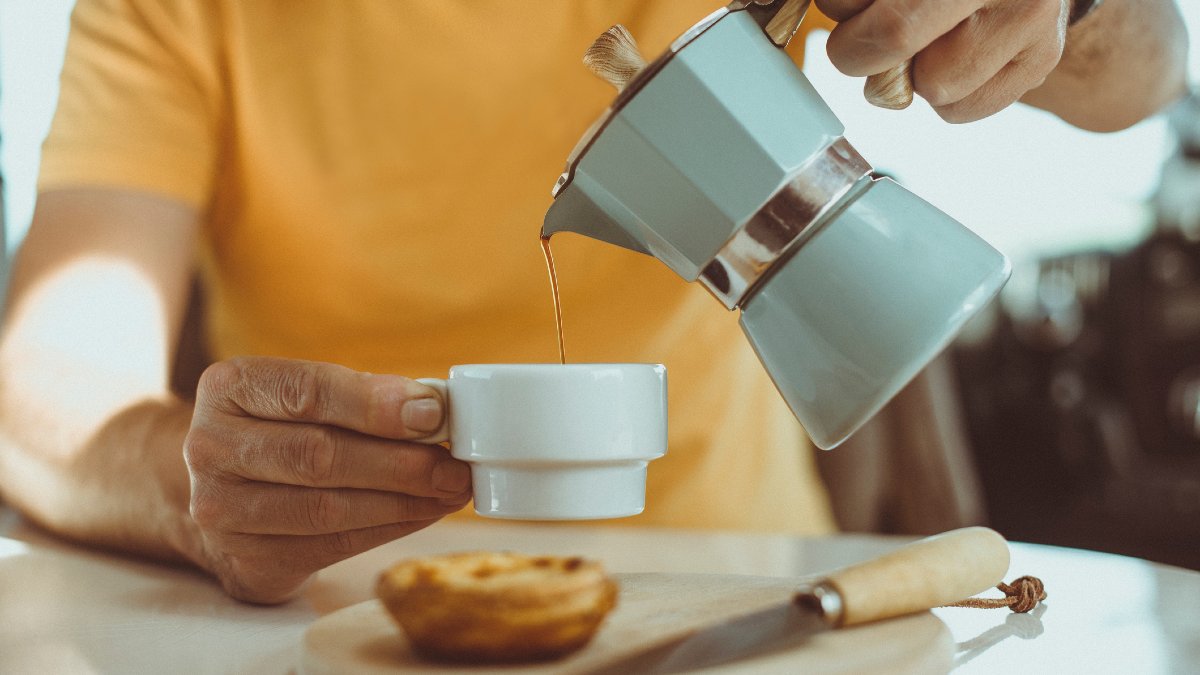
Stovetop coffee makers can be used on induction stoves so long as the base in made from a ferromagnetic metal. Image: Getty
Manual coffee machines
There are several types of manual coffee makers available. They all feature low energy use and upfront costs but typically make a simpler style of coffee. They do not heat water by themselves, requiring a third element (either a kettle or cooktop) to achieve the heat required for making coffee.
Stovetop coffee makers
Best for: Simplicity, sustainability and durability
Stovetop coffee makers, also known as moka pots, work by using heat to force water through coffee grounds, creating coffee. The designs typically comprise of two metal chambers with a metal filter funnel that sits inbetween. This makes them easy to clean and use, with a quality model likely to last you decades if cared for well.
The coffee maker requires heat from either an electric or gas cooktop to function. They can also be used when camping. Place the moka pot on a metal grate sitting above hot coals (not directly on the flame). For a more balanced extraction, use room‑temperature water, not hot or boiling, in the boiler chamber when brewing.
Cost: From $20.
Do stovetop coffee makers work on induction cooktops?
Moka pots have traditionally been made from aluminium, which by itself will not work on an induction stove.
However, many stovetop coffee maker manufacturers now make specific models that will work on induction cooktops. Some also make induction plates that allow heat to transfer from the induction stove to an otherwise incompatible moka pot.
New to induction stoves? Here's how they work.
French press coffee makers
Best for: A full-bodied cup that can be customised
French press coffee makers work similar to a teapot and are ideal for those who prefer black coffee. They work by placing ground coffee in the bottom of the French press before pouring very hot (not boiling) water over the top. After steeping, a filtered plunger is used to separate the grounds from the liquid before pouring into a cup. You can adjust the flavour of your coffee by changing the temperature of the water or steep time.
French presses take up little space and are easy to clean, though glass versions can break easily.
Cost: From $20
How much electricity do coffee machines use?
Coffee machines generally do not use a lot of energy. While they do use a significant amount while in use, an at-home machine is typically used only a few times a day, keeping the overall electricity costs low.
You can reduce your energy usage further by investing in solar panels, or a panel and battery system.
A French press coffee maker only uses the electricity required to boil your kettle. Modern kettles are typically around 2000W, which costs about $0.10 per day for ten-minutes of usage.
A stovetop coffee machine placed on a gas cooktop doesn’t use any electricity to run (but will, of course, use gas).
| Coffee machine | ||||
|---|---|---|---|---|
|
Espresso machine (manual) |
1200-1600W |
10 |
$0.06-$0.08 |
$1.86-$2.48/ $5.46-$7.28 |
|
Espresso machine (auto) |
1300-1900W |
10 |
$0.06–$0.09 |
$1.86–$2.79/ $5.46–$8.19 |
|
Pod/capsule machine |
1200-1500W |
10 |
$0.06-$0.07 |
$1.86-$2.17/ $5.46-$6.37 |
|
Drip filter machine |
1000W |
10 |
$0.05 |
$1.55/ $4.55 |
|
Stovetop/moka pot (electric cooktop |
1200-2400W |
10 |
$0.06-$0.12 |
$1.86-$3.72/ $5.46-$10.92 |
|
Stovetop/moka pot (induction cooktop) |
1600-3000W |
10 |
$0.08-$0.14 |
$2.48-$4.34 $7.28-$12.74 |
All kWh costs are calculated using the mean Victorian Default Offer of 29 cents per hour and are exclusive of the daily supply charge. Costs and appliance wattages are a guide only, refer to your own appliance ratings and energy provider for more accurate information. Source: sa.gov.au.
Tips for choosing the best coffee machine
Ask yourself the following questions to help work out the best type of coffee machine for your home.
- What type of coffee do I like (e.g. black, milky, strong, watery)?
- How much coffee do I drink? How much does my household drink?
- How much control do I want to have over the brewing process?
- How quickly do I need to make my coffee?
- Where will I keep my coffee machine (do you have bench space for a bulk model)?
- Do I need my coffee machine to be portable or easy to move?
- What built-in features do I want in my coffee machine (e.g. grinder, milk steamer)?
Frequently asked questions
Ultimately, what machine makes the ‘best’ coffee is highly subjective. With the right skills and experience, excellent quality coffee can be made with any coffee machine.
But if you’re after at-home coffee that most closely resembles what you’d get at a café, opt for a manual espresso machine – and then commit to learning how to use it correctly.
Likewise, if you prefer a milky coffee than a drip filter machine might not be the one for you.
Stovetop, French press, drip and espresso machines (both manual and auto) can all be sustainable coffee machine options. Powering your home using solar, where possible, can make brewing your coffee even more sustainable (and cheaper too).
For machines that require a filter, choose reusable metal filters where possible. Alternatively, select paper coffee filters that can be composted.
Yes, certain types of coffee machines need regular servicing to work well and produce tasty coffee. These include automatic espresso machines as well as some semi-automatic or manual models – refer to the owner’s manual for information on whether your machine needs professional servicing.
You don’t need a coffee grinder to make coffee at home. While coffee beans must be ground before brewing, pre-ground coffee can be readily purchased from supermarkets and grocers.
However, many coffee lovers prefer to grind their coffee beans themself. This can help preserve the flavour and shelf life, as well as tailor the grind size to your specific coffee maker. Grind the beans immediately prior to brewing for best results and only grind as much as you need for that batch of coffee.
Some espresso machines grind the beans for your as part of the coffee making process. In-built grinders are most common in automatic espresso makers as well as some manual models.
Coffee grinders can be bought from many appliance, homewares and department stores for as little as $30.
Used coffee grounds can be disposed of in your compost or kerbside green waste bin.
They can also be used as a rub for meat or as a weed suppressant in your garden. Despite popular advice, putting coffee grounds in your garden soil can actually inhibit plant growth. Instead, let them decompose for several months in your compost bin before using on garden beds.

