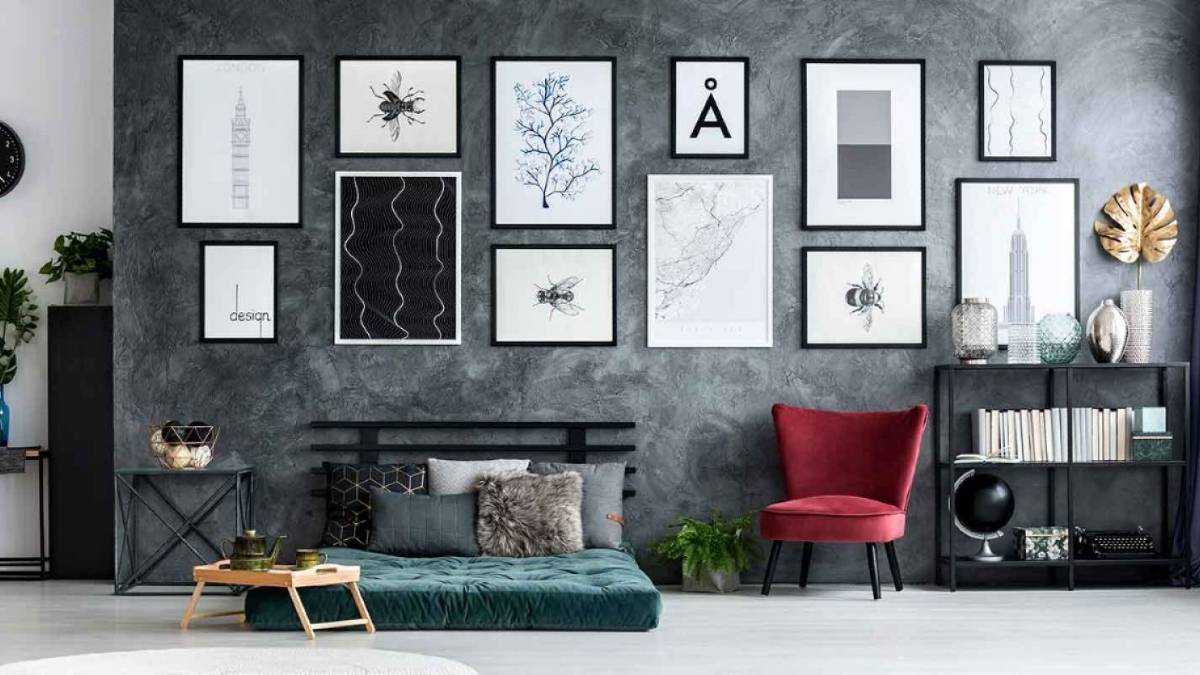
5 tips for creating your own gallery wall at home

assortment of paintings in living room near furniture and blue curtains

Jessica Taylor Yates

Posted July 19, 2021


Turn your bland space into a work of art with our list of tips and tricks to creating your own gallery wall. 

Gone are the days of picture-perfect portraits hanging side by side neatly on your wall. These days, your home is a form of expression, and what better way to show your love of art, photographs and prints than on your very own gallery wall? Putting up your art in a defined space with a multitude of colours, sizes, shapes and prints is a great way to give a focal point to your space while showcasing your interests and passions. 

That said, there are still some style rules you should follow to ensure your wall of crazy prints don’t fight for attention and end up looking messier than a toddler’s playroom. While curating may feel daunting at first, follow our guide for how to make your crazy gallery wall a creative success – no previous artistic prowess required.  


How to make your own gallery wall 


Start with choosing a feature wall space

Find the space in your home to be the focal point for your gallery wall. If you only have a few pieces of art, or if they’re smaller in size, this may be in a bathroom, nook of your bedroom or even your kitchen.

If you have bigger prints or a larger quantity of works, you may look to make your gallery wall a feature in your living room or above your bed. Taking both the size of your art and the wall into consideration is key before getting started – it’s all in the details.
 

grey feature wall with various prints behind a bed and a chair

You can look to unite your gallery wall through common themes like frames, art type or colour. Image: Getty. 


Choose your art

Art on the wall doesn’t just need to be traditional paintings or portraits. Consider combining these with photographs, prints, and even items such as wall sculptures, embroidery, or decorative plates to keep the eye interested. If you’re unsure on the theme or where to start, have a browse through our selection of over 1000 artworks online to help you get inspired.

For those just getting started in the gallery wall game, you may want to unite your artworks with a common ‘theme’ that ties it all together, such as the frames, type of art, shape, or idea. This could include:

  • Matching frames, such as all white or gold to keep it all cohesive
  • Similarly styled artworks, such as all prints; all black and white photographs; art from the same place (e.g. animal prints from a holiday or particular artist) or artworks with a similar colour palette
  • Adding in items of interest such as framed tickets, coins, or notes in shadowboxes

If you prefer to be a bit more flamboyant, have fun with colours, shapes, frames, works and sizes, or consider having some of your art framed and some not.   

Plan out your design

This is the step that arguably takes the most time, but will save you a lot of heartache later. Yes, you could consider just throwing your artwork up haphazardly, but it’s likely this will end up crooked and off-kilter – definitely not the best way to show off your collection.

There are a few places you could consider laying out your grand design before it’s ready for the wall. Practise spacing out your design on your dining room table, the floor, or some large tracing or butcher paper. Plan out how you will lay out your images on your gallery wall by starting with your biggest piece. You may want this to be central, and you can work outwards. This looks good if your gallery will be somewhat symmetrical on both sides.

Otherwise, you could consider your largest item to either bookend your wall or be slightly off centre for visual interest, and then be complemented with your second largest piece. From here, take time to have fun and play around with your pieces, making sure the design is visually appealing.

  • Do – consider mixing up horizontal and vertical pieces, different colours and shapes and different designs.
  • Don’t – put all like items together on one side, leaving the rest looking disjointed and messy. For example, if half your items are black and white photos and others are prints, mix them all up rather than a half and half design for greater visual compatibility.

Once you are done, take a photo to use as a reference for when you start hanging your gallery wall. This process will take time, but it’s important to have your gallery wall looking perfect in the lead-up to the main event – putting it up on the wall. 

six pictures hanging on a wall in room with several chairs on wooden floor

Ensuring your frames are the same width apart assures coherency and makes your works of different art come together. Image: Getty. 


Hang up your artwork

Using your photo for reference, you can begin the process of putting up your gallery wall. For heavier works, you will need nails, a hammer and a drill; for lighter items or in rentals, consider removable hooks.

The main trick to ensuring your wall still looks organised despite bursting with different colours, prints, and frames is to measure, measure, and measure again! For your first few prints, consider using a level so they are straight, or you risk your whole wall looking like the Leaning Tower of Pisa.

While your prints themselves may be different sizes, leaving a similar ‘gap’ between images will make your gallery wall look cohesive and well thought out. To measure the same amount of space between prints, you can consider using painter’s tape, a measuring tape or pencil. 

Don’t be afraid to change over time

After inviting people over to marvel at your artistic creation, don’t be afraid to change it up over time. Now that you have the area ‘planned out’, the same prints don’t need to stay there forever. You may wish to update the area with children’s drawings, add in more recent photographs, or sub out more relevant prints as time goes on. Keeping your gallery wall as a revolving exhibition will ensure it is always a focal point of your home.